
 by
by 
When it comes to personalizing your Charger, choosing between a wrap and a paint job is a critical decision that can significantly affect both the appearance and protection of your vehicle. Each option offers its own set of advantages and challenges, making it essential for car enthusiasts to understand the nuances of both customization methods. While paint provides a classic and durable finish, vinyl wrapping is gaining popularity for its versatility and ease of application.
The process of applying a vinyl wrap involves covering the car’s surface with a thin layer of colored material. This method allows for various textures, colors, and designs that are not always achievable with traditional paint. Additionally, a wrap can be easier to remove, giving owners the flexibility to change their vehicle’s look without the long-term commitment of a painted finish. However, the lifespan of a vinyl wrap often depends on factors such as UV exposure and maintenance.
On the other hand, a professional paint job can provide a sleek, high-gloss finish that is both beautiful and durable. Paint is typically more robust against the elements and can last for years if properly cared for. Yet, the application process usually requires more time and often a higher financial investment. Understanding the differences in longevity, maintenance, and repairability between these two options is essential for making an informed choice when seeking to customize your Charger.
Cost Comparison: Vinyl Wrap vs Professional Paint Job
When considering color customization for your Charger, it is essential to evaluate the financial implications of vinyl wraps versus professional paint jobs. Both options provide unique aesthetic benefits, but their costs can vary significantly.
Vinyl Wrap: The average cost for a full vinyl wrap typically ranges from $2,500 to $5,000, depending on the quality of the vinyl used and the complexity of the installation. Vinyl wraps are designed for easier application and removal, which can contribute to their appeal as a less permanent option. Additionally, the installation process itself is generally quicker than that of a paint job, often taking only a few days to complete.
Professional Paint Job: In contrast, a professional paint job can cost anywhere from $5,000 to $15,000, influenced by the type of paint used, the number of layers applied, and the level of detail in the finish. High-quality paint jobs typically take longer to complete, as they require meticulous prep work, multiple curing stages, and comprehensive inspections to ensure a flawless surface. Moreover, once a car is painted, the only option to change the color again is to repaint or wrap, which can add to long-term costs.
In summary, while a vinyl wrap tends to be a more cost-effective and versatile option, a professional paint job offers durability and depth of finish. It is crucial to assess personal preferences and budget constraints when deciding between these two methods for customizing your Charger.
Longevity and Durability of Wraps Compared to Paint Finishes
When considering the longevity and durability of vehicle customization options, both wraps and paint finishes offer unique advantages. Vinyl wraps are designed to withstand various environmental conditions, providing a protective layer over the original paint. Typically, high-quality vinyl can last anywhere from five to seven years, depending on maintenance and exposure to elements such as UV rays and harsh weather.
In contrast, paint jobs generally offer a longer lifespan, often lasting a decade or more if properly cared for. However, traditional paint finishes can be more susceptible to scratches and chips, particularly if the vehicle is frequently exposed to gravel roads or rough conditions. Advanced paint technologies, such as ceramic coatings, can enhance durability, but they also come at a higher cost and require more time to apply.
One of the significant advantages of a vinyl wrap over paint is its ease of removal. When the job is no longer desired, wraps can be removed without damaging the underlying surface, preserving the vehicle’s original finish. In contrast, repainting requires sanding down the existing layer, which can lead to a less uniform look if not done correctly.
Maintenance plays a crucial role in the durability of both options. Vinyl wraps require specific cleaning techniques to avoid damage, while paint finishes benefit from regular waxing and polishing to enhance their shine and protect against fading. Ultimately, the choice between wraps and paint should consider both the desired aesthetic and how the vehicle will be used, ensuring that the selected option meets both the longevity and durability requirements of the owner.
Step-by-Step Guide to Applying Vinyl Wrap on Your Charger
Applying a vinyl wrap to your Charger can elevate its appearance and provide protection to the original paint. Follow this detailed guide to achieve a professional-looking job.
Step 1: Gather Necessary Materials
Before starting, ensure you have the following materials:
- High-quality vinyl wrap
- Utility knife or razor blade
- Squeegee and application tool
- Heat gun
- Isopropyl alcohol and clean cloth
- Roll of masking tape
Step 2: Prepare the Surface
Thoroughly wash your Charger to remove any dirt and grease. Once clean, use isopropyl alcohol to wipe down the surfaces where the vinyl will be applied. This step ensures better adhesion.
Step 3: Measure and Cut the Vinyl
Measure the sections of your Charger that you plan to wrap. Cut the vinyl slightly larger than the measured areas to allow for adjustments during application.
Step 4: Position the Vinyl
Carefully place the cut vinyl over the area you wish to cover. Use masking tape to hold it in place temporarily. Ensure it is aligned correctly before making any final adjustments.
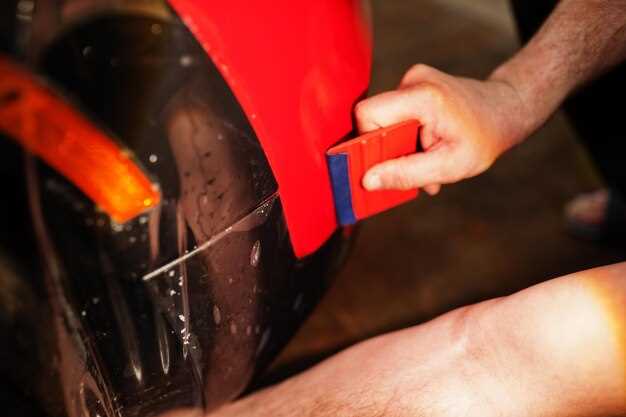
Step 5: Apply the Vinyl
Using the squeegee, start from the center and work your way toward the edges to push out air bubbles. Maintain even pressure to ensure a smooth job. For curves and edges, a heat gun will help the vinyl conform better to the surface.
Step 6: Trim Excess Vinyl
Once the vinyl is applied smoothly, use the utility knife to trim the excess material along the edges of the surfaces. Be careful not to cut into the paint beneath the wrap.
Step 7: Final Inspection and Fixes
Inspect the wrapped areas carefully for any bubbles or imperfections. If needed, use the heat gun to gently reheat areas and smooth them out. A well-applied wrap will enhance your Charger’s look significantly.
Step 8: Allow to Set
After completing the wrap, allow it to set for a few hours. Avoid washing the car for at least 48 hours to ensure the vinyl adheres properly and lasts longer.


