

 by
by 
The Dodge Charger has long been celebrated as one of the most iconic muscle cars of its era, captivating automotive enthusiasts with its powerful performance and distinctive design. As time has passed, many of these classic vehicles have fallen into disrepair, making restoration not only a passion project but a rewarding endeavor for many car aficionados. This guide will explore the essential steps and considerations involved in the restoration of a classic Dodge Charger, ensuring that it regains its former glory while preserving its authentic character.
Restoring a classic car is more than just a mechanical overhaul; it is an art form that combines historical appreciation with modern skill. Whether you are a seasoned restorer or a newcomer to the world of classic car restoration, understanding the intricate details of the Dodge Charger will enhance your project. The path to an exceptional restoration involves thorough research, careful planning, and a commitment to quality craftsmanship. In the following sections, we will delve into each phase of the restoration process, from sourcing parts to final touches, guiding you through this exhilarating journey.
Assessing the Condition of Your Dodge Charger Before Restoration
Before diving into the restoration of your classic Dodge Charger, it’s essential to conduct a thorough assessment of its current condition. This step will guide you in identifying the extent of necessary repairs and determining if the restoration is feasible or cost-effective.
Start by inspecting the body of the Charger for rust and dents. Check common problem areas such as the wheel wells, undercarriage, and the areas around windows and doors. Note any signs of previous repairs or damage that could complicate the restoration process.
Examine the engine and mechanical components, including the transmission, brakes, and suspension. Consider conducting a compression test on the engine to gauge its health. Assessing these parts will help you estimate the work required to bring the vehicle back to its former glory.
Additionally, review the interior condition. Look for signs of wear on seats, carpets, and the dashboard. If the upholstery is damaged, consider whether it can be repaired or will need replacement. This assessment will impact your restoration budget and timeline.
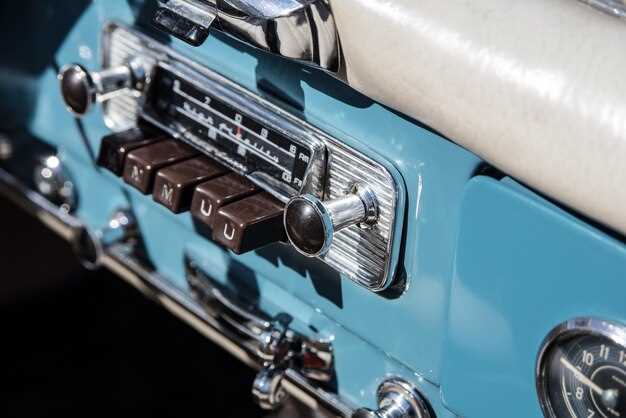
Lastly, evaluate the electrical system, including wiring, lights, and gauges. A malfunctioning electrical system can create significant challenges during restoration. By thoroughly assessing all these elements, you will better understand what is needed to restore your classic Dodge Charger to its original state.
Key Steps in the Mechanical Restoration of a Classic Charger
The mechanical restoration of a classic Charger involves a systematic approach to ensure that the vehicle operates efficiently and reliably. The first crucial step is a thorough assessment of the engine. Examine the engine for signs of wear, leaks, or damage. It is essential to perform a compression test to evaluate the health of the cylinders and determine if a rebuild is necessary.
Next, focus on the transmission. Inspect the transmission fluid for discoloration and check for any leaks. Rebuilding or replacing the transmission may be required to ensure smooth shifting and performance. Change the fluids, including the oil, coolant, brake fluid, and differential fluid, to maintain optimal working conditions.
Brake systems require attention as well. Inspect discs, pads, lines, and the master cylinder for deterioration or damage. Replacing worn components will enhance safety and performance. Don’t forget to examine the suspension system, including shocks, struts, and bushings, to improve handling and ride quality.
Examine the electrical system, including the battery, alternator, and ignition system. Ensure all connections are secure, and replace any faulty wiring or components. Achieving reliable electrics is essential for the operation of lights, gauges, and starting the engine.
Finally, after completing the mechanical aspects, perform a comprehensive test drive to evaluate the Charger’s performance. Listen for unusual noises, assess the behavior during acceleration and braking, and note any issues that may remain. This final step will help in identifying areas that may require further attention before enjoying your restored classic Dodge Charger on the road.
Choosing the Right Paint and Finishing Techniques for Your Charger
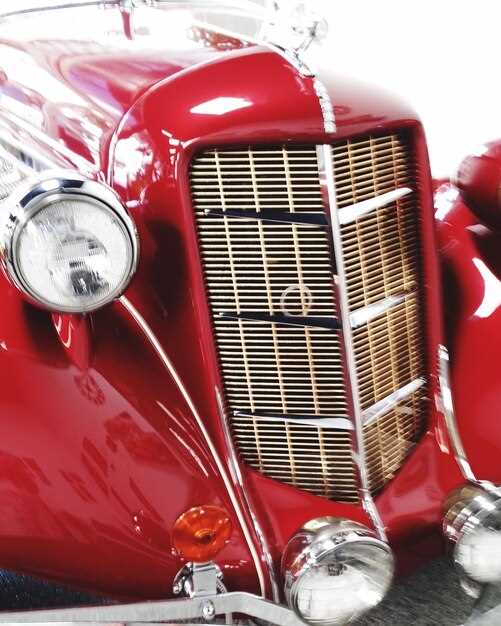
Restoring a classic Dodge Charger requires careful consideration of paint and finishing techniques to ensure the vehicle not only looks stunning but also retains its authenticity. The paint you choose can make a significant impact on the overall restoration process.
1. Selecting the Right Paint Type: When restoring a classic car, you should opt for high-quality paint that resembles the original finish. Two popular options are lacquer and urethane. Lacquer provides a deep, glossy finish and is generally easier to work with for touch-ups, but it may not be as durable as urethane. Urethane paints are known for their chemical resistance and longevity, making them an excellent choice for a more durable finish.
2. Color Considerations: The original color of your Charger can enhance its value and maintain its classic aesthetic. Research the factory color options available for your model year and use codes from restoration guides. If you want to personalize your car, consider a color that complements the classic lines of the Charger while still being respectful of its heritage.
3. Prepping the Surface: Achieving a flawless finish starts with proper surface preparation. This includes sanding the old paint, repairing any rust, and using a good primer. A smooth surface ensures better adhesion and a more professional look. Pay special attention to seams, edges, and hard-to-reach areas, as these spots can reveal imperfections if not carefully prepared.
4. Application Techniques: Utilize proper application techniques to achieve a professional finish. Techniques can vary based on the paint type. For example, when using a spray gun for urethane paint, maintain a consistent distance and speed to prevent runs and uneven coverage. Consider using multiple thin coats rather than one heavy coat, as this helps with curing and provides a better final appearance.
5. Finishing Touches: After the paint has dried, consider adding a clear coat for additional protection and shine. A clear coat not only enhances the paint’s depth but also provides a barrier against environmental elements like UV rays and contaminants. Buffing and polishing the surface after application can achieve a mirror-like finish that showcases the beauty of your restoration.
By taking the time to choose the right paint and finishing techniques, you can ensure that your classic Dodge Charger looks its best while honoring its heritage. Attention to detail in this stage of restoration will help you create a vehicle that stands out and lasts for years to come.


