
 by
by 
Painting your Dodge Charger can be a rewarding and fulfilling experience, allowing you to personalize and restore your vehicle to its former glory. Whether you are aiming for a fresh new look or wanting to maintain the classic appeal of your car, mastery over the painting process is essential for achieving professional results. Understanding the necessary steps and techniques can significantly enhance the final outcome and ensure that your Charger shines for years to come.
In this guide, we will delve into various aspects of paint preparation and application, emphasizing the importance of proper restoration methods. From selecting the right tools and materials to mastering the application techniques, our tips and tricks will help you navigate each phase of the painting process with confidence. By following these guidelines, you can transform your Dodge Charger into a stunning piece of art that not only reflects your personal style but also stands the test of time.
Whether you’re a seasoned automotive enthusiast or a DIY beginner, understanding the nuances of car painting is key to achieving a high-quality finish. Explore our comprehensive tips to ensure your Dodge Charger receives the attention and care it deserves, resulting in a beautiful, long-lasting paint job that turns heads on every road.
Guide to Painting Your Dodge Charger: Tips and Tricks
Painting your Dodge Charger not only enhances its appearance but also protects it from environmental elements. Proper restoration through painting can add significant value to your vehicle. Here are essential tips and tricks to achieve a professional-looking finish.
1. Choose the Right Paint: Select high-quality automotive paint that is suitable for your Charger. Consider using a base coat and clear coat system for durability and shine. Be sure to match the color to maintain the car’s aesthetic appeal.
2. Prepare the Surface: Preparation is crucial for a successful paint job. Start by washing the vehicle thoroughly to remove dirt and grease. Sand down any imperfections, rust spots, or old paint using sandpaper or a vibration sander. This will create a smooth surface for the new paint.
3. Mask Off Areas: Use painter’s tape to protect windows, trim, and any areas you do not want painted. Ensure the tape is applied firmly to prevent bleed-through. Cover the rest of the vehicle with plastic sheeting to keep overspray under control.
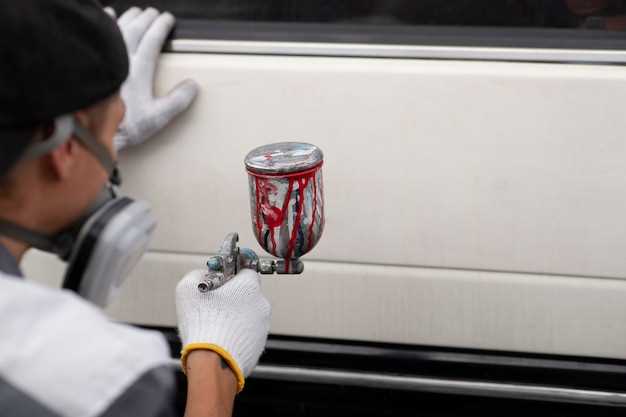
4. Use Proper Techniques: When applying paint, keep the spray can or gun at a consistent distance from the surface. Apply several thin coats rather than one thick coat. Allow each coat to dry according to the manufacturer’s instructions before applying the next.
5. Drying and Curing: After applying the last coat of paint, let your Dodge Charger dry in a controlled environment. Avoid exposing it to moisture or extreme temperatures during the curing process to ensure the paint adheres properly.
6. Finishing Touches: After the paint has cured, consider polishing the surface for added shine. A good wax or sealant can protect the paint and give your Charger a glossy finish.
7. Maintenance: Once painted, maintain the quality by washing your car regularly and applying wax every few months. This will help preserve the paint and keep your vehicle looking fresh for years to come.
By following these tips and tricks, you can transform your Dodge Charger through effective restoration and paint application, resulting in a car that turns heads on the road.
Preparing Your Dodge Charger for a Flawless Paint Job
To achieve a flawless paint job on your Dodge Charger, proper preparation is essential. Begin by selecting a suitable workspace that is well-ventilated and free from dust and debris. A clean environment minimizes the risk of contaminants settling on your vehicle’s surface during the painting process.
Next, thoroughly wash your Charger with a high-quality automotive soap. This step removes dirt, grease, and previous waxes that could interfere with paint adhesion. After washing, dry the vehicle completely with a microfiber cloth to prevent water spots.
Inspect the Surface: Carefully examine the car’s exterior for any imperfections such as scratches, dents, or rust. Address these issues before starting the paint job. Use a sandpaper in appropriate grits to smooth out rough spots and to feather the edges of any damaged areas. For deeper scratches or dents, consider using body filler to achieve a smooth finish.
Masking: Proper masking is crucial to protect areas that should not be painted. Use quality painter’s tape to cover windows, trim, and lights. Ensure that the edges are pressed down firmly to prevent paint from seeping underneath the tape.
Priming: Applying a primer is a vital step that enhances adhesion and provides a uniform base for the paint. Choose a primer that matches the type of paint you plan to use, whether it’s solvent-based or water-based. After applying the primer, allow it to cure properly according to the manufacturer’s instructions.
Finally, gather all necessary materials before starting your paint job, including the chosen paint, clear coat, spray gun or paintbrush, protective gear, and additional masking tape. Being well-prepared ensures a smoother process and contributes to the overall quality of your finished paint job.
Choosing the Right Paint and Tools for Ultimate Restoration
Restoring your Dodge Charger requires careful selection of paint and tools to achieve a flawless job. The right combination can make a significant difference in the final outcome. Below are essential considerations to guide your choices.
Types of Paint:
- Acrylic Enamel: Offers a durable finish and is easy to apply. Ideal for beginners.
- Acrylic Urethane: Provides excellent resistance to UV rays and chemicals, ideal for long-lasting jobs.
- Base-Coat/Clear-Coat: This system enhances depth and shine but requires more skill for application.
- Single-Stage Paint: Simplifies the process as it combines color and gloss in one layer.
Considerations When Choosing Paint:
- Evaluate the desired finish–matte, glossy, or satin.
- Check compatibility with your existing paint and surfaces.
- Consider the climate and environmental conditions where the vehicle will be used.
- Assess the required level of protection against scratches and chips.
Essential Tools:
- Sanders: For surface preparation, a DA sander is highly recommended for a smooth base.
- Spray Gun: Choose a quality HVLP gun for better paint atomization and control.
- Paint Mixing Cups: Ensure accurate mixing ratios for optimal results.
- Masking Tape: Use high-quality tape to ensure clean lines and avoid overspray.
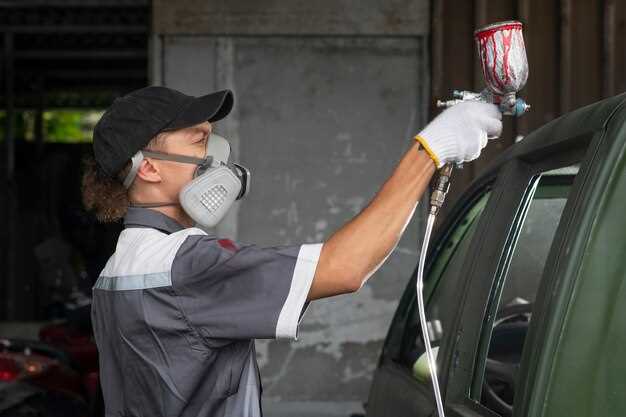
- Protective Gear: Always wear a respirator, gloves, and goggles to safeguard against fumes and particles.
By carefully selecting the right paint and tools, you can enhance the quality of your restoration job and achieve a stunning finish on your Dodge Charger. Take your time to research and invest in quality materials for the best results.
Common Mistakes to Avoid During the Painting Process
One of the most significant mistakes during a painting job is not properly preparing the surface. Failing to clean, sand, and prime the vehicle can lead to poor paint adhesion and an unsatisfactory finish. Always ensure that the surface is free of dirt, grease, and rust before applying any paint.
Another common error is using low-quality paint. Investing in high-quality automotive paint will yield better results in terms of durability, color retention, and overall appearance. Cheap paint often lacks the necessary components that ensure longevity and resilience against the elements.
Many DIY painters underestimate the importance of proper ventilation. Painting in a non-ventilated area can lead to the accumulation of harmful fumes and may result in a subpar job due to the inability of the paint to cure appropriately. Ensure adequate airflow to achieve the best results.
Applying paint too thickly is a frequent mistake that can cause drips and uneven surfaces. It’s essential to use light, even coats rather than trying to cover everything in one go. Multiple thin layers allow for better drying and finishing.
Additionally, ignoring the environmental conditions can significantly impact the outcome. Painting in extreme temperatures or high humidity can interfere with the curing process and affect adhesion. Aim for ideal conditions recommended by the paint manufacturer for optimal results.
Lastly, neglecting safety precautions can lead to serious health risks. Always wear protective gear, such as gloves and masks, when dealing with paint and solvents to avoid inhalation of harmful chemicals. Taking safety seriously not only protects you but also ensures a successful painting job.


