

 by
by 
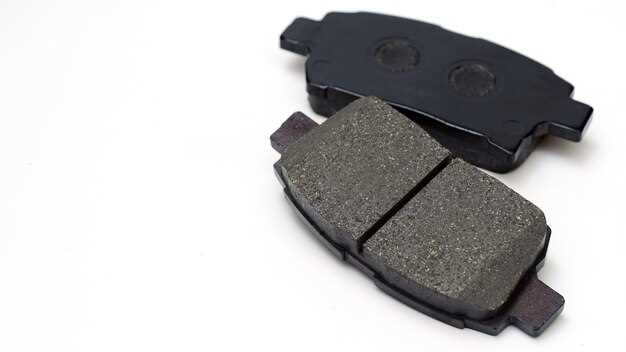
Replacing the brake pads on your Dodge Charger is a crucial part of vehicle maintenance that ensures your safety and the performance of your vehicle. Over time, brake pads wear down due to friction and heat generated during braking. Regularly checking and, if necessary, replacing these pads can prevent more extensive repair work down the line, saving you both time and money.
The process of replacing brake pads is more straightforward than many car owners believe. With the right tools and a bit of guidance, you can successfully complete this task in your own garage. This guide will walk you through the necessary steps, from gathering the appropriate materials to the final installation of the new pads.
Understanding when to replace your brake pads is essential. Signs of worn-out pads include a squealing noise during braking, decreased stopping power, or the warning light appearing on your dashboard. Maintaining your brake system not only enhances your driving experience but also ensures that your Dodge Charger remains reliable on the road.
Tools Required for Brake Pad Replacement on Dodge Chargers
Replacing brake pads on a Dodge Charger requires several essential tools to ensure the job is done correctly and safely. Below is a list of the tools you will need during the process:
1. Car Jack and Jack Stands: A reliable car jack is crucial for lifting your Charger off the ground. Pair it with sturdy jack stands to securely support the vehicle while you work on the brakes.
2. Lug Wrench: This tool is necessary for removing the wheel lug nuts. Ensure that the lug wrench fits the specific size of your Charger’s lug nuts.
3. Ratchet and Socket Set: A ratchet and various sockets will be needed to remove the caliper bolts and any other components holding the brake pads in place. Typically, a 13mm or 15mm socket will be required for most Dodge models.
4. Brake Pad Spreader or C-Clamp: This tool is used to compress the brake caliper piston, making it easier to fit the new brake pads into place. A brake pad spreader is generally more efficient, but a C-clamp works well as well.
5. Torque Wrench: When reassembling the brake components, a torque wrench is essential to ensure that all bolts are tightened to the manufacturer’s specifications.
6. Brake Cleaner: A can of brake cleaner helps clean the brake components, removing dust and debris that can affect braking performance. This keeps the brake system functioning optimally.
7. Gloves and Safety Glasses: Protecting yourself is crucial. Wear gloves to prevent skin contact with grease and chemical residues, and safety glasses to shield your eyes from debris.
Having these tools on hand will significantly facilitate the brake pad replacement process on your Dodge Charger, ensuring you can perform the task efficiently and safely.
Step-by-Step Process for Removing Old Brake Pads
When it comes to replacing the brake pads on your Dodge Charger, properly removing the old pads is crucial. Follow these steps for an efficient and safe removal process.
- Gather Necessary Tools: Before starting, ensure you have all the required tools at hand. This includes:
- Socket wrench
- Jack and jack stands
- Brake cleaner
- Flathead screwdriver
- Pry bar or brake pad spreader
- Prepare the Vehicle: Park your Dodge Charger on a flat surface. Engage the parking brake and turn off the engine. It’s advisable to wear safety glasses and gloves for protection.
- Lift the Vehicle: Using the jack, elevate the front or rear end of the car, depending on which brake pads you are replacing. Secure the vehicle with jack stands for safety.
- Remove the Wheel: Utilize the socket wrench to remove the lug nuts and take off the wheel. This will expose the brake assembly.
- Locate the Brake Caliper: Identify the brake caliper that holds the brake pads in place. Take note of how it is secured; it typically has two bolts.
- Unbolt the Caliper: Use the socket wrench to remove the caliper bolts. Carefully slide the caliper off the rotor, making sure not to put stress on the brake lines.
- Remove Old Brake Pads: The old brake pads will be attached to the caliper bracket. Slide the old pads out of their positions. If they are stuck, gently pry them free using a flathead screwdriver.
- Inspect the Disc: Once the pads are removed, check the brake rotor for any signs of damage or wear. Clean the rotor using brake cleaner if necessary.
After completing these steps, you will have successfully removed the old brake pads from your Dodge Charger, setting the stage for installation of the new pads.
Tips for Installing New Brake Pads on Dodge Chargers
When replacing brake pads on your Dodge Charger, proper installation is crucial for ensuring optimal performance and safety. Here are some essential tips to follow:
1. Gather Necessary Tools: Before starting, ensure you have all the required tools at hand, including a jack, jack stands, lug wrench, socket set, and brake pad spreader. This will streamline the process and prevent interruptions.
2. Ensure Vehicle Stability: Always park your Charger on a flat surface and engage the parking brake. Use wheel chocks to prevent any movement during the installation process.
3. Remove the Wheel Carefully: After loosening the lug nuts slightly while the wheel is still on the ground, lift the vehicle using a jack and secure it with jack stands. Complete the removal of the lug nuts and set the wheel aside.
4. Inspect Brake Components: Before installing new brake pads, inspect the rotor and caliper for wear or damage. Clean any accumulated dust or debris to ensure smooth operation and to extend the lifespan of the new pads.
5. Compress the Caliper Piston: Use a brake pad spreader or C-clamp to gently push the caliper piston back into its housing. This step is essential to create enough space for the new pads to fit.
6. Correct Orientation of Brake Pads: Ensure that the new pads are installed in the correct orientation. Most brake pads are designed with a specific side that faces the rotor, so pay attention to the manufacturer’s markings.
7. Lubricate Contact Points: Apply high-temperature brake grease to the backing of the new pads and any contact points on the caliper. This will reduce noise and help prevent binding.
8. Reassemble and Torque Properly: After installing the new pads, reattach the caliper and ensure all bolts are tightened to the manufacturer’s specifications. When putting the wheel back on, torque the lug nuts in a star pattern to ensure even pressure.
9. Test the Brakes: Before driving the vehicle, pump the brake pedal several times to seat the new pads properly against the rotor. This step is vital for restoring brake function before hitting the road.
10. Take Caution During First Drive: After installation, take the Charger for a short, cautious drive to test the brakes. Listen for unusual noises and ensure that the braking performance is smooth and effective.


