

 by
by 
Installing a new alternator in your Charger can seem like a daunting task, but with the right preparation and guidance, it can be accomplished successfully. An alternator is crucial for your vehicle’s electrical system, as it supplies power to the battery and other electrical components while the engine is running. Understanding the steps involved in this installation process will empower you to take on this project confidently.
Before you begin, it’s essential to gather the necessary tools and materials. Make sure you have a replacement alternator that fits your Charger model, along with basic hand tools such as wrenches, sockets, and a multimeter for testing. Additionally, having a repair manual specific to your vehicle can provide valuable insights and torque specifications to ensure the installation is done correctly.
As you prepare to install the new alternator, safety should be your top priority. Always disconnect the battery to prevent any electrical hazards while you’re working on the engine. With a systematic approach, you can remove the old alternator, install the new one, and make all the appropriate connections. Following this guide will help you navigate each step of the process with clarity and ease.
Choosing the Right Alternator for Your Charger Model
Selecting the correct alternator for your Charger model is crucial to ensure optimal performance and reliability. Each Charger model may have different electrical requirements, so it is essential to know the specifications that fit your vehicle. Start by consulting your owner’s manual or checking online resources to find the original equipment manufacturer (OEM) specifications for your specific model year.
When choosing an alternator, pay attention to the amperage output. Chargers designed for higher electrical loads, such as those with additional accessories or powerful audio systems, may require an alternator with a higher amperage rating. Ensure that the alternator you select meets or exceeds the factory specifications to avoid electrical issues.
Compatibility is another key factor. Some Chargers may have variations in alternator mounts and connectors based on the engine size or production year. Look for an alternator that is specifically designed for your Charger model to avoid fitment problems during installation.
It’s also advisable to consider the type of alternator: remanufactured or new. Remanufactured alternators can be cost-effective, but ensure they have a reliable warranty and come from a reputable supplier. New alternators are often more expensive but provide peace of mind with their longevity and performance.
Finally, read reviews and seek recommendations for brands that have a good reputation in the automotive community. Brands with positive feedback often indicate reliability and performance, which is essential for the alternator’s long-term function in your Charger.
Step-by-Step Process to Remove the Old Alternator

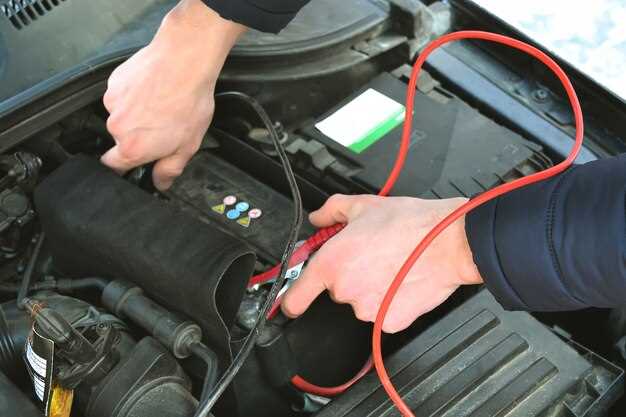
Before starting the removal process, ensure the vehicle is parked on a flat surface and the engine is off. Disconnect the negative battery cable using a wrench to prevent electrical shocks.
Locate the alternator, which is typically found near the front of the engine. Identify the mounting bolts securing the alternator to the engine block. Using a socket wrench, carefully loosen and remove these bolts while holding the alternator in place to avoid accidental dropping.
Next, disconnect the electrical connections attached to the alternator. This usually involves unplugging the wiring harness and removing the positive battery terminal bolt. Make sure to take note of the configuration for reinstallation.
Once all connections are detached, gently pivot the alternator and slide it out of the mounting brackets. Be cautious of any remaining connections or belts, making sure they are not damaged during the removal process.
After the alternator is free, inspect the surrounding area for any debris or worn components that may need attention when installing the new alternator. With the old alternator removed, the next step will be to prepare for the installation of a new one.
Connecting and Testing the New Alternator After Installation
Once you have successfully installed the new alternator in your Charger, the next step is to connect it properly and perform essential tests to ensure it functions correctly.
Step 1: Connect the Wiring Harness
Begin by connecting the wiring harness to the alternator. Ensure that the connectors are clean and free of corrosion. Align the connector with the correct orientation and push it in until you hear a click. This indicates that it is securely attached. If your alternator has additional wires, such as a ground wire, connect those accordingly as well.
Step 2: Attach the Battery Cables
Next, reconnect the battery cables. Start with the positive terminal by placing the cable on the alternator’s positive post and securing it with a nut. Follow this by connecting the negative terminal. Always ensure that the connections are tight to prevent any power loss.
Step 3: Inspect for Loose Connections
Before proceeding to test the alternator, take a moment to visually inspect all connections made. Ensure that nothing is loose and that all wires are properly secured. This will help prevent any future electrical issues.
Step 4: Start the Engine
After the connections are secured, start the engine of your Charger. Listen for any unusual noises that might indicate an issue with the alternator’s installation. A smooth-running engine indicates a successful installation.
Step 5: Test the Voltage Output
To check the alternator’s output, use a multimeter. With the engine running, set the multimeter to DC voltage and connect the positive lead to the positive battery terminal and the negative lead to the negative terminal. A healthy alternator should produce a voltage reading between 13.5 and 14.5 volts. If the voltage is lower than this range, it may indicate a problem with the installation or the alternator itself.
Step 6: Check the Dashboard Warning Lights
Finally, monitor your dashboard for any warning lights. If the battery light remains illuminated after starting the engine, it may suggest that the alternator is not charging the battery properly. If everything checks out, you can feel confident that the new alternator has been correctly installed.
By following these steps, you will ensure that your new alternator is not only connected but also functioning effectively, providing the power your Charger needs to run smoothly.


